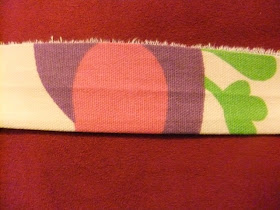
One of the super stitchers from the lillybo quilts was having a bit of trouble making the bag ,so here is a very simple picture tutorial for a simple bag which is perfect to put the quilt in. this bag could be made in under an hour..... honest. It has probably taken longer to write this tutorial he he
This is the first time I have done anything like this so I hope you can understand it.
My bag is a little shopper for GD Erin. Well a girl has to start sometime.
Cut 2 rectangles the same size, (any size can be made) 1" bigger all round than the finished size. Cut 2 more rectangles the same size in the lining material
sew right sides together around 3 sides leaving the top open.... If your fabric has a one way design like mine remember to make sure the front and back are the right way up.
Sew the lining together in the same way except leave a 10cm gap in the lower edge.... so the
bag can be turned the right way out. Iron the seems open as shown
Decide how deep you want the gusset on your bag and sew across the base seam. This bag has a 2" gusset, so measure 1" from the seam to the edge of the bag. Do the same at the other end.
Make sure you line the base seam and the side seam up so the seam is in the middle of the gusset.
your bag should look like this
Trim the gusset seam as shown
Turn the bag right sides out.
Make the handles.
Cut a piece of fabric 4 x the width you want your handle and twice the length of one. Iron in half lengthways.Fold the outer long edges together and iron again. Stitch close to both edges to look like top stitching
cut the long piece in half to make 2 handles
Pin the handle to the right side of the bag and secure with stitching (I used zig zag for extra strength)
Repeat the other side. Instead of pins I use Clove wonder clips they are ... wonderful!!
With right sides together slip the lining over the top of the bag making sure the handles are encased inside and the top edges are lined up. Stitch all the way around the top. I like to double stitch where the handles are for strength.
Neaten the top edge and iron flat. Top stitch around the top to finish.
Remember to hand sew the gap in the bottom of the lining or you may 'loose' things inside
Voila your bag is finished.....
This bag can be embellished with pockets, zips, etc etc, but it is really easy.
Any questions just ask.
If you make a bag please let me know, leave me a link so I can have a look.
happy sewing
janet


Ace absolutely Id have done this exactly the same way well done.
ReplyDeleteGreat tutorial Janet!
ReplyDelete